Marble Nails
Posted on Mar 11 2013
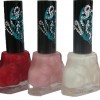
Another quick easy nail art idea that can give amazing effects. For this you will need: 1 x light coloured background nail polish, we used white 3 different colour polishes, we used red, purple and pink 1 x marbeling or dotting tool Marbled Nails the easy way Apply a thick...
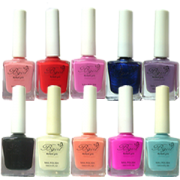
We have just received a shipment of 10 colours in Matte. Check out what you can do with these polishes. Source: Uploaded by user via Laura on Pinterest Source: ason98519.tumblr.com via BMNE Direct on Pinterest Source: google.co.uk via BMNE Direct on Pinterest Source: nice-pictures.info via BMNE Direct on Pinterest The above three are done using a gloss top coat, when a top coat is applied the matte look disappears. Another thing you could try is using two different colour matte...
Articles - NailsEasy Steps to Acrylic Application We have rewritten our 10 step How to Apply Acrylic Nails Guide to be more indepth for the user. Before you start, grab all the equipment you will need and make sure...
Help with Acrylic NailsThe gels we supply with our kits are all one step gels, this means that you use one gel for all the applications.? It is applied thin like a coat of nail polish and we recommend 2-3 coats, curing each...
Gel Nails
